

Right of Way Quilt Block Tutorial
FABRIC REQUIREMENTS
Background Fabric:
7—2 1/2″ squares
9—2 1/2″ X 6 1/2″ rectangles
2—2 1/2″ X 9 1/2″ rectangles
Print fabric:
I chose a scrappy look to make a very colorful block, scraps from your stash would be just fine. I’ve chosen 12 different fabrics to make my block. However, Block A requires a 2 1/2″ X 18″ strip for each of these blocks (3 in total)
Subcut:
2—2 1/2″ squares of each fabric
2—2 1/2″ X 6 1/2″ rectangles of each fabric
2—2 1/2″ squares
5—1 1/2″ X 6 1/2″ strips
2—1 1/2″ X 9 1/2″ strips

Remember 1/4″ seams!
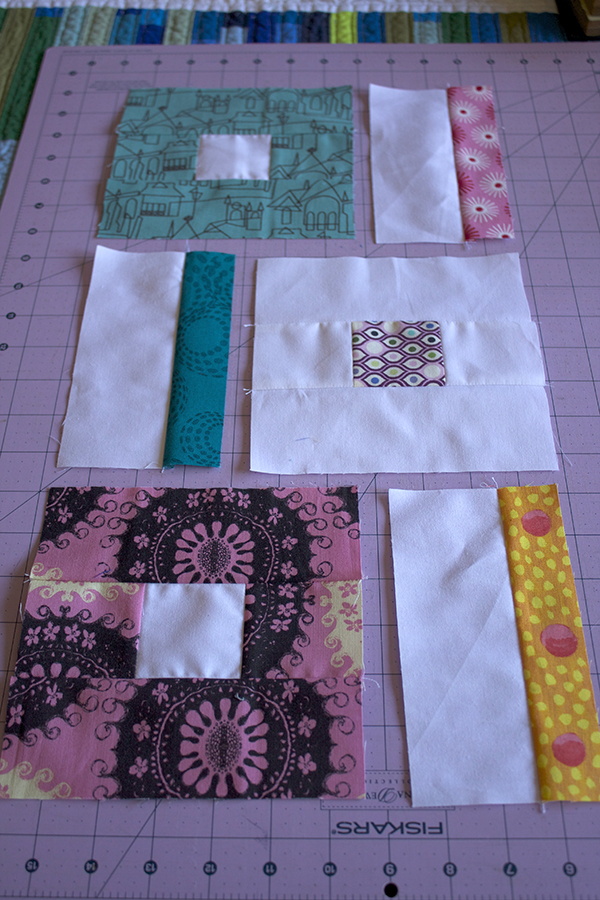
BLOCK A
• sew a 2 1/2″ square of print fabric onto top and bottom of a 2 1/2″ square of background fabric.
• join a 2 1/2″ X 6 1/2″ print fabric to each side of the above unit.
Press all seams open for this project.

BLOCK B
Directions for block B are the same steps for making Block A, except the fabric placement are opposite (refer to photo).
Make 3 of Block A and 2 of Block B
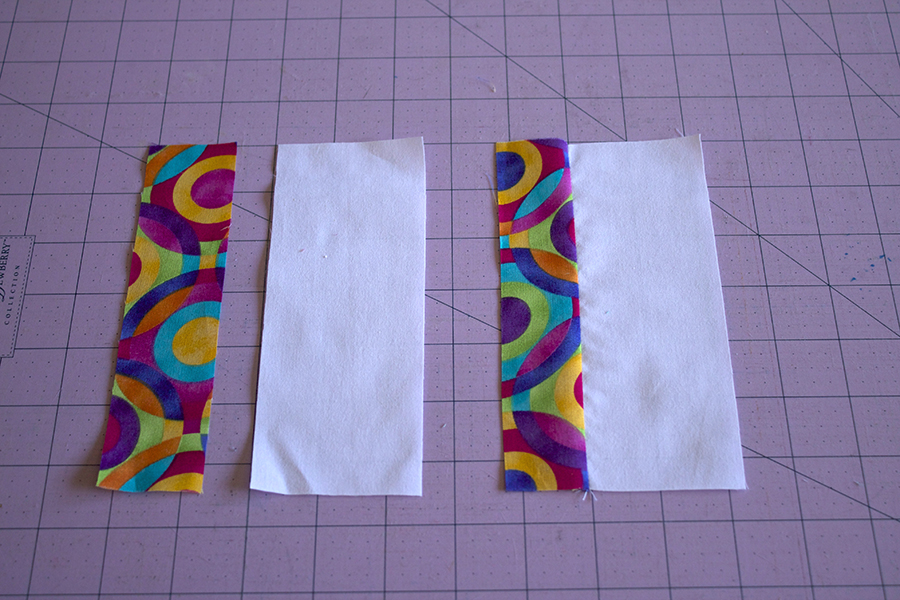
BLOCK C
sew a 1 1/2 inch X 6 1/2 inch strip of print fabric onto a 2 1/2 inch X 6 1/2 inch strip of background fabric.

BLOCK D
sew a 1 1/2 inch X 9 1/2 inch strip of print fabric onto a 2 1/2 inch X 9 1/2 inch strip of background fabric.
Make 5 of Block C and 2 of Block D

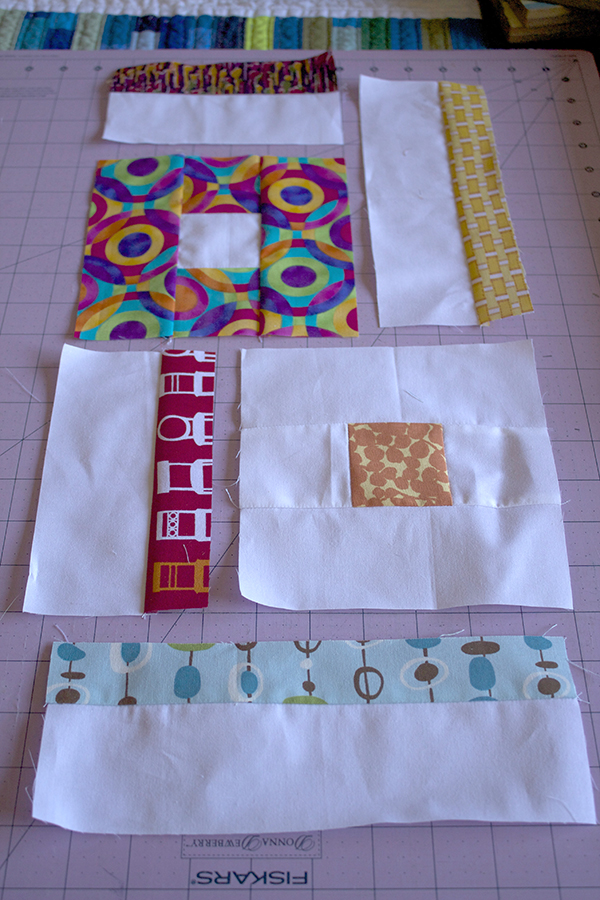
BLOCK ASSEMBLY
Sew Block C to Block A (refer to above photo for color placement)
Make 2
Sew Block C to Block B
Make 1

Join block segments as shown above.
Sew Block C to Block A. Next, add Block D onto Block C/A.
Sew Block C to Block B. Next, add Block D onto bottom of Block C/B.

Join segments as shown in the above photo.
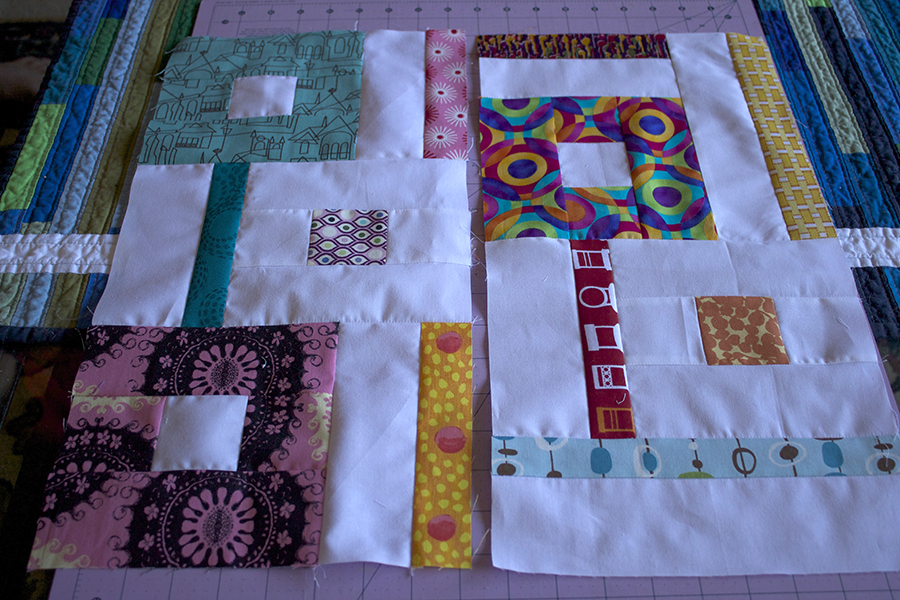
Join left and right sides to complete the block.
