
Supplies
Eight 10″ squares of two different colors (total 16 squares.) High contrast is key to making this block work.
 Step 1:
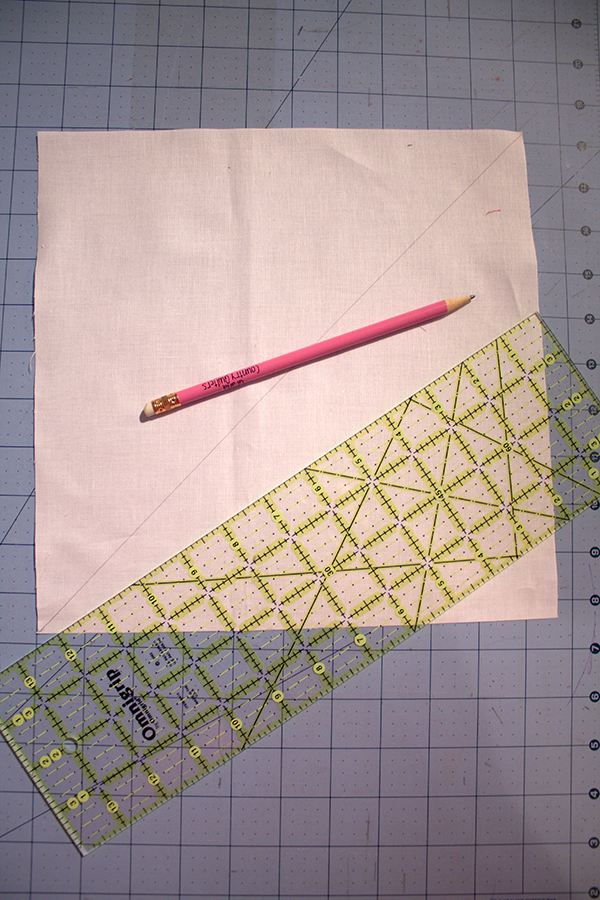
On each light square, draw a diagonal line, from corner to corner. I’ve lightly drawn the line using a pencil, but you could use any type of fabric marker.
 Step 2:
Match one light 10″ square with one dark 10″ square, right sides together, and sew a scant 1/4″ seam on each side of the drawn line. Repeat step 2 with all of the sets of squares.
 Step 3:
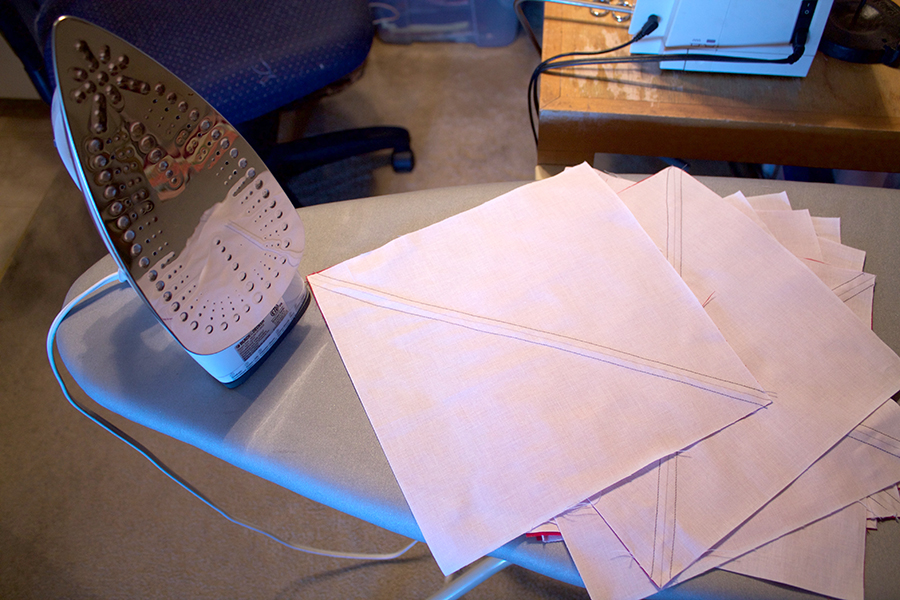
Cut each of the sets of squares on the diagonal line you drew in Step 1. Step 3 should yield 16 half-square triangles (HST). Press each of the sets with the seam allowance to the dark fabric.
Step 4:
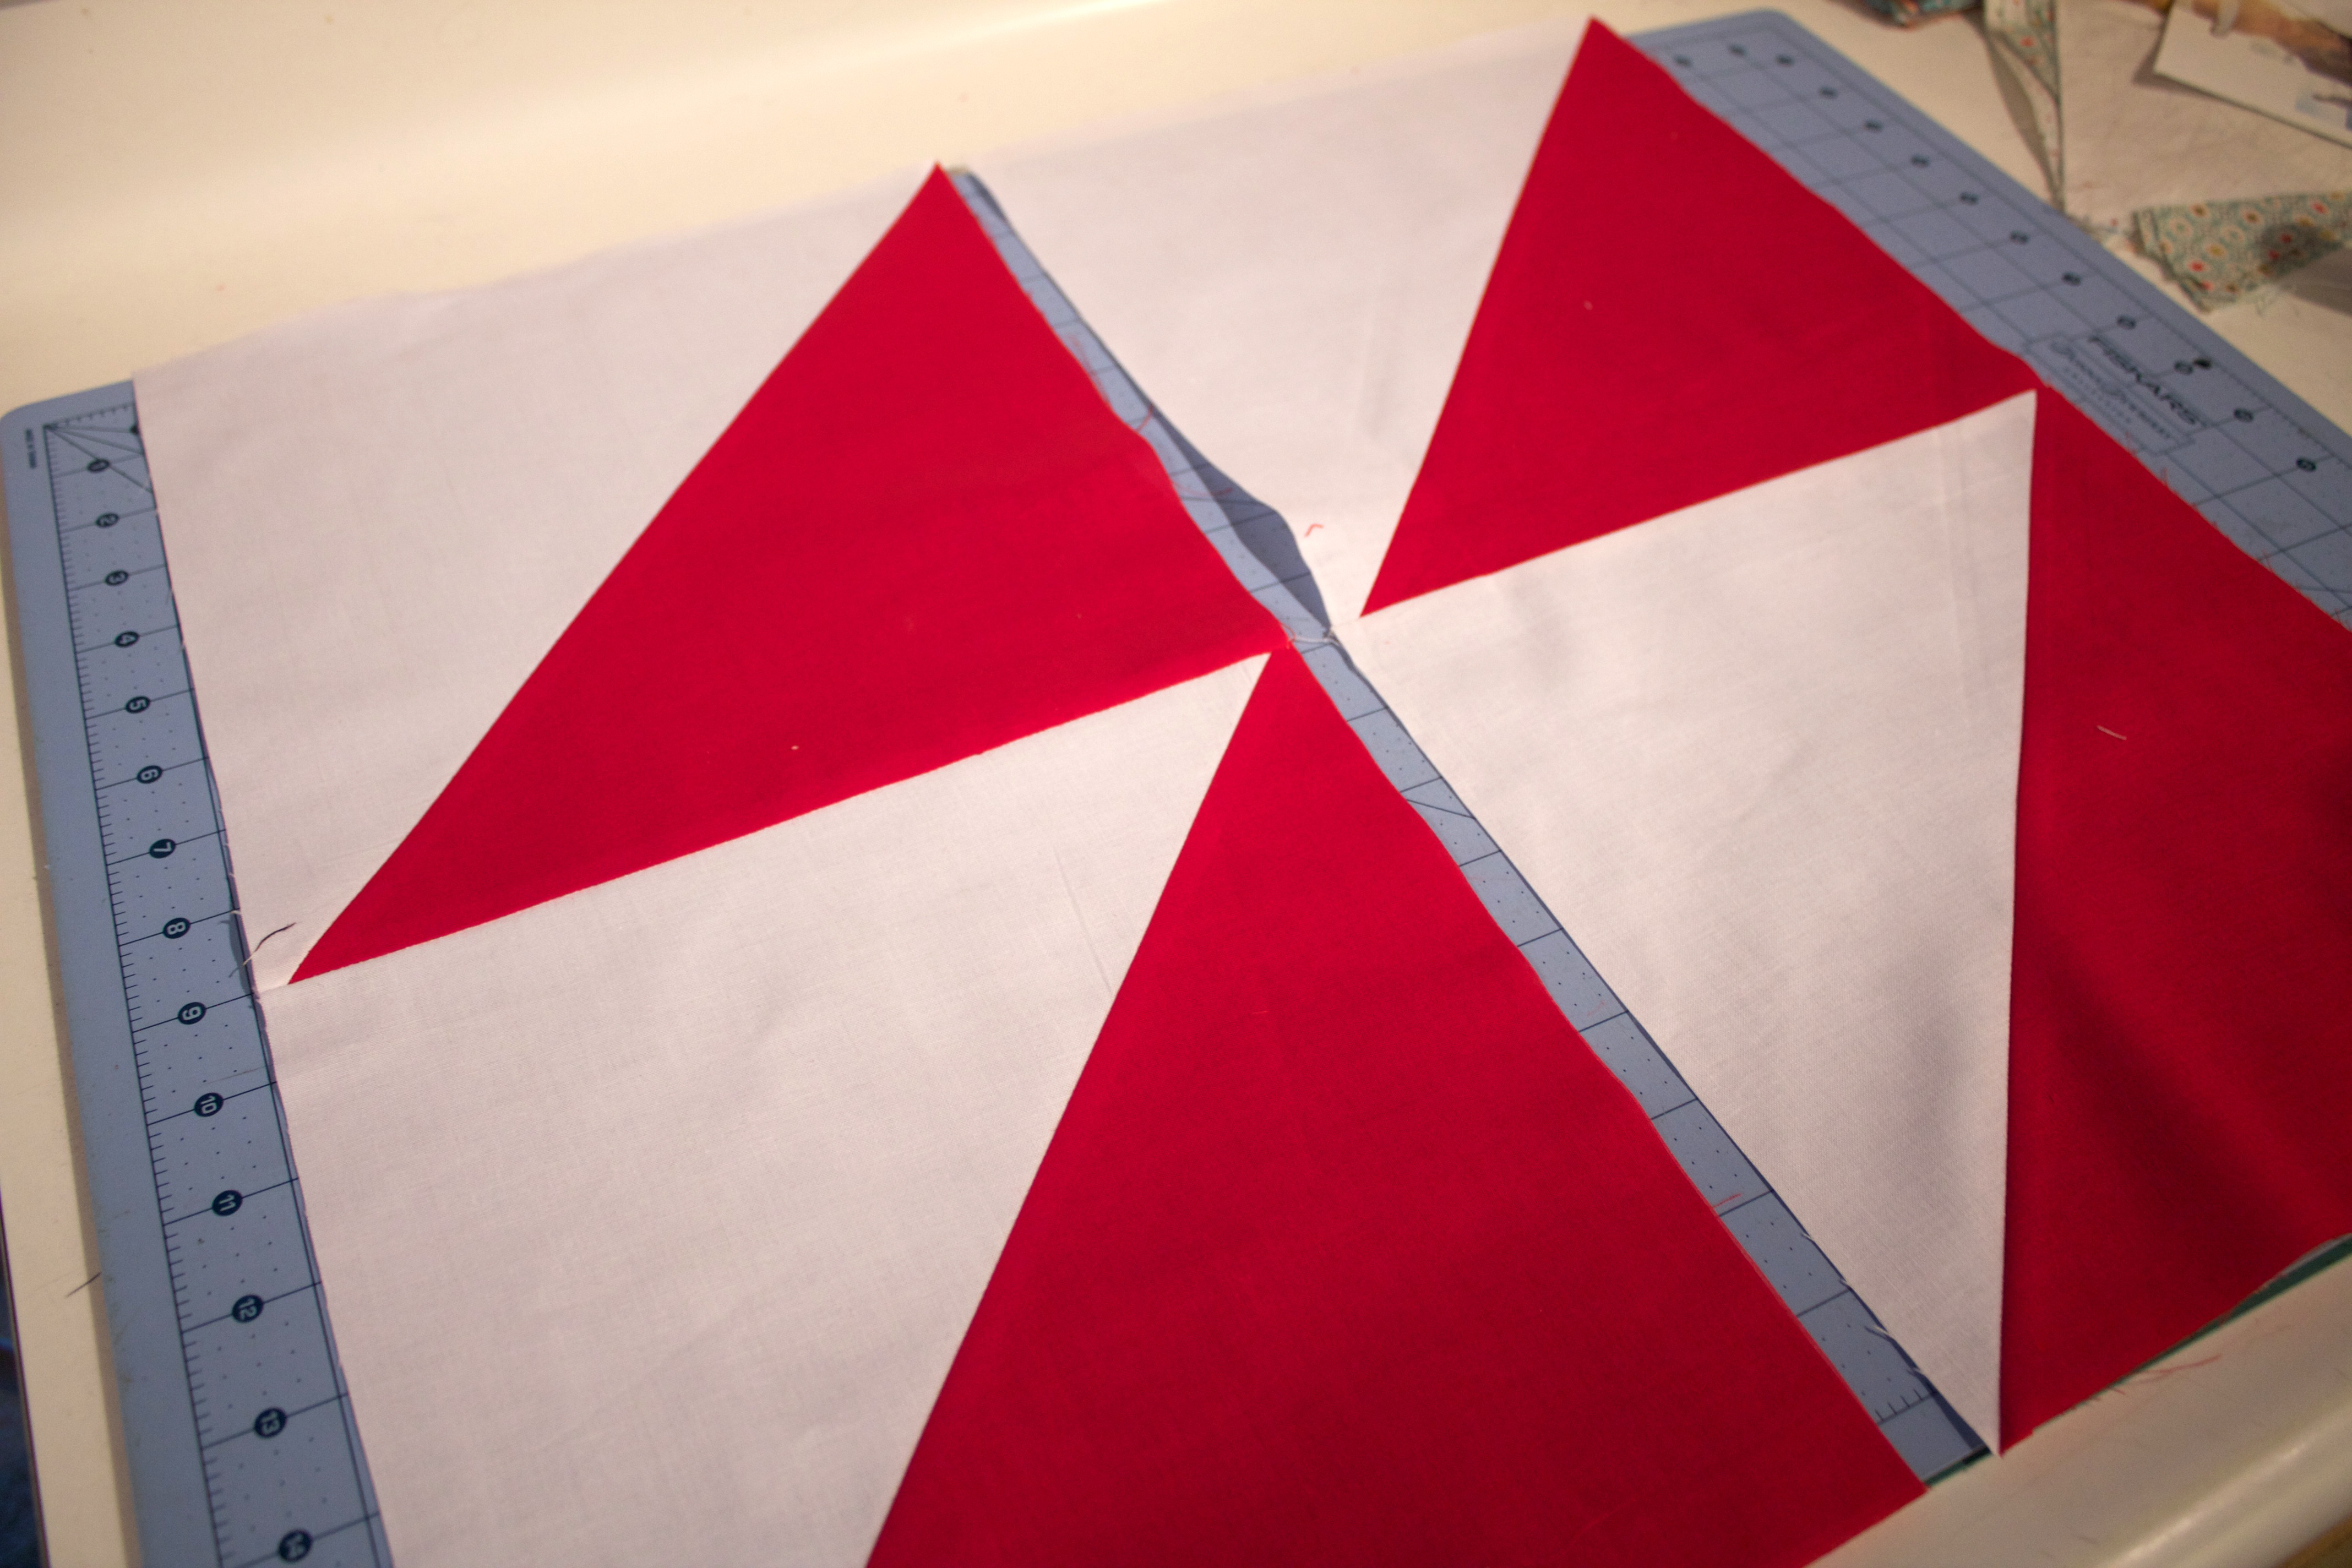
Join two of the HSTs as illustrated. Repeat with all pairs, yielding 4 sets. Notice the orientation of each of the squares…they should all go the same direction.
 Step 5:
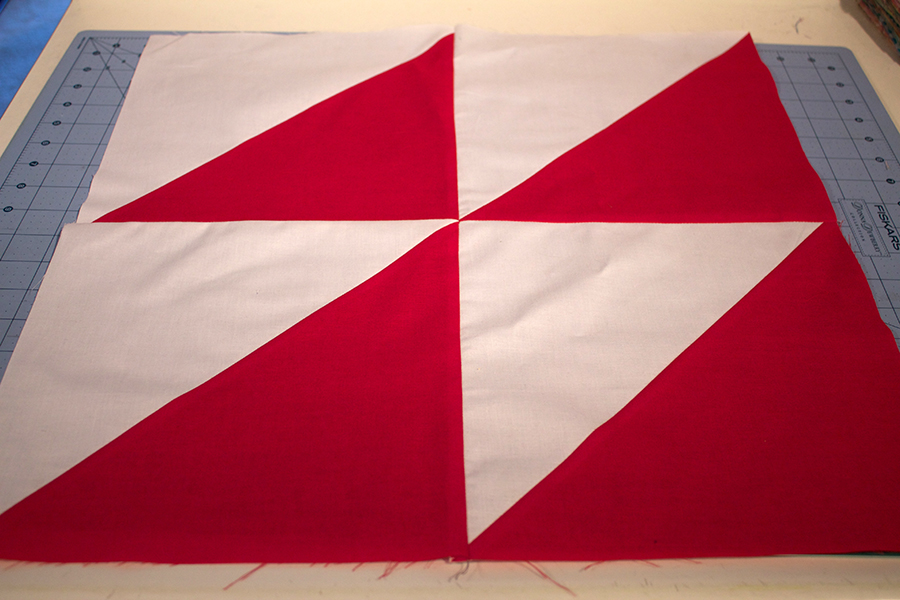
Join two pairs of HST units to make one large four patch. Repeat with other pair yielding two large 4 patches.
 Step 6:
For the next step, use the center of the block as the “mid-line”.
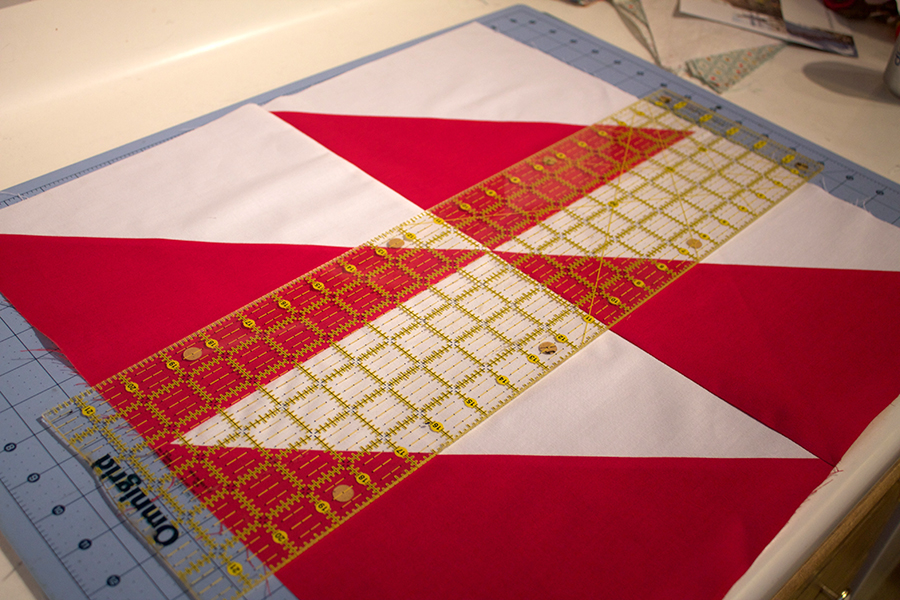
 Step 7:
Using the mid-line, make 3 cuts of varying widths across one side of the block.
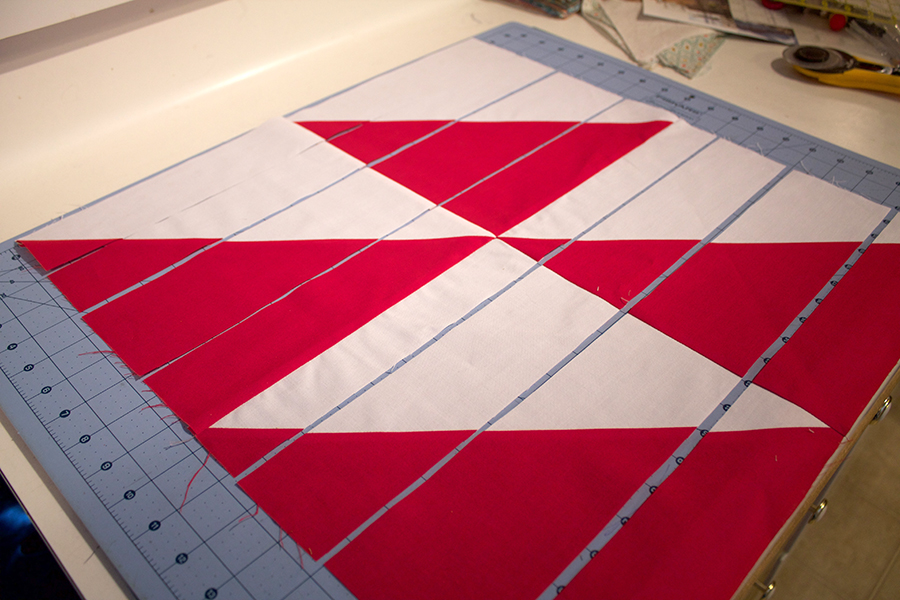 Step 8:
Repeat Step 7 on the other side of the mid-line of your block. This will yield 7 strips of varying widths. Repeat Step 7 and Step 8 on the other blocks.
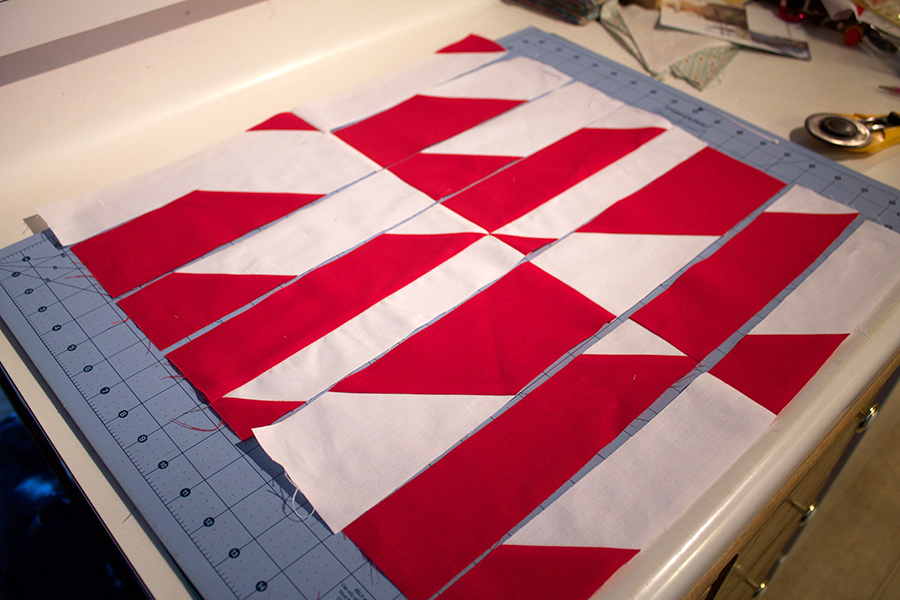 Step 9:
Rearrange each set of 7 strips until you’re happy with the design. Note: The previous mid-line of your block doesn’t need to stay in the center…move all the strips around until you like it.
 Step 10:
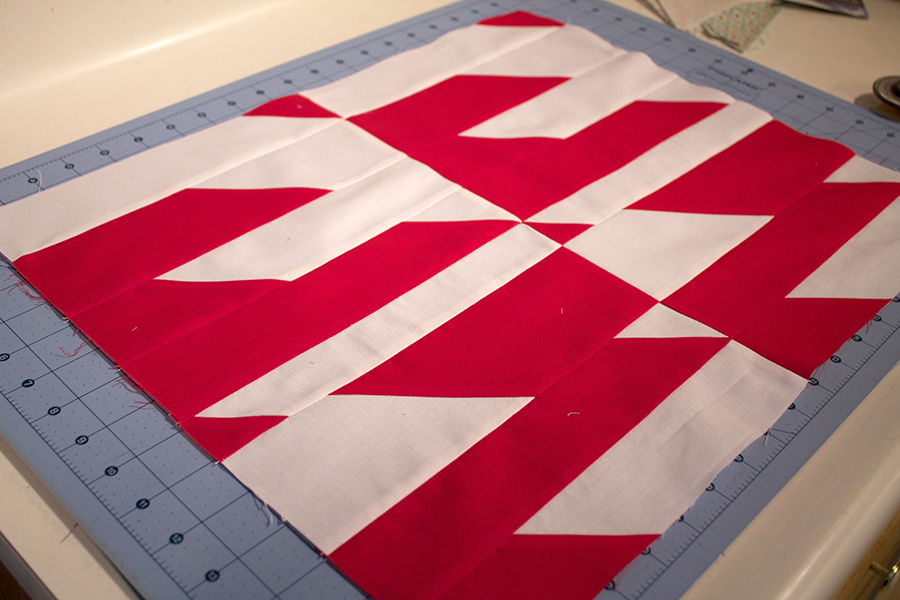
Sew each of the 7 strips back together to re-assemble your blocks. The blocks will no longer be square.
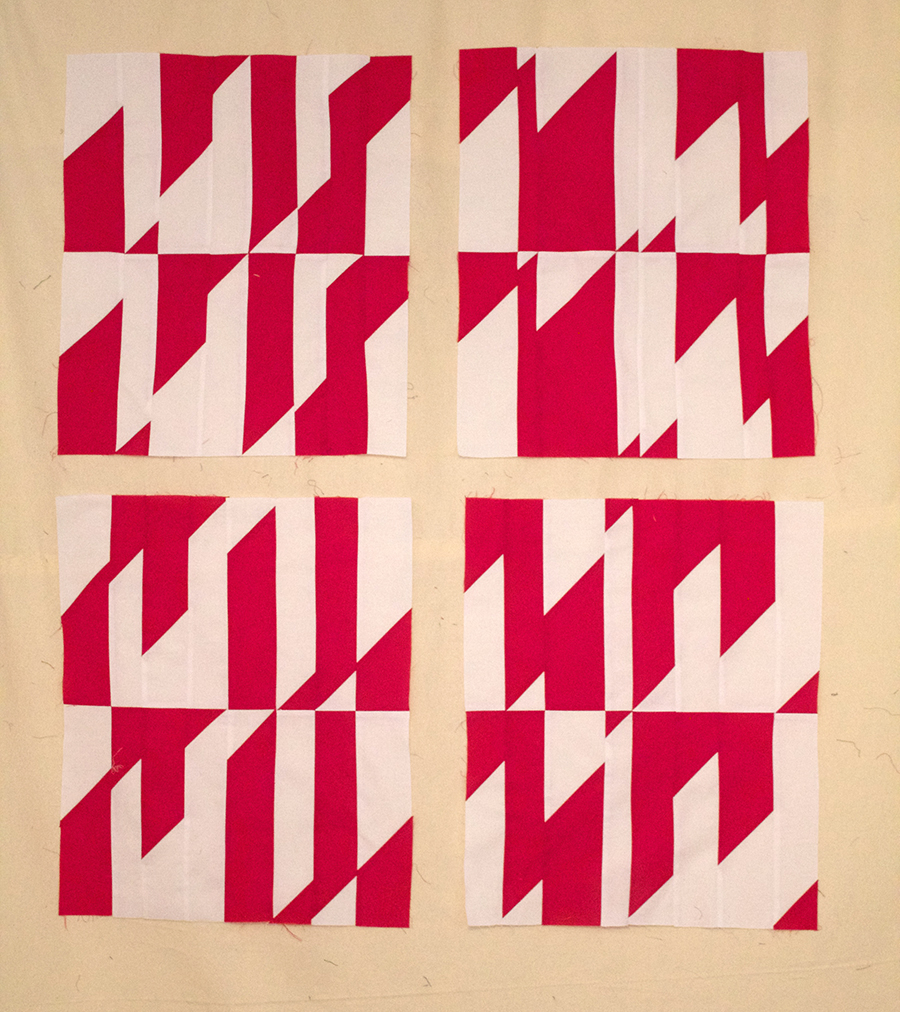 Step 11:
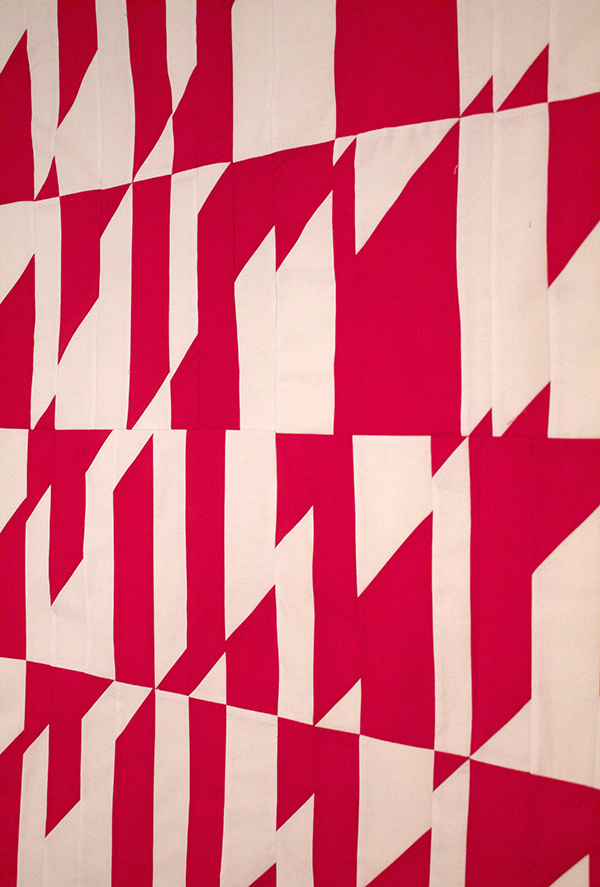
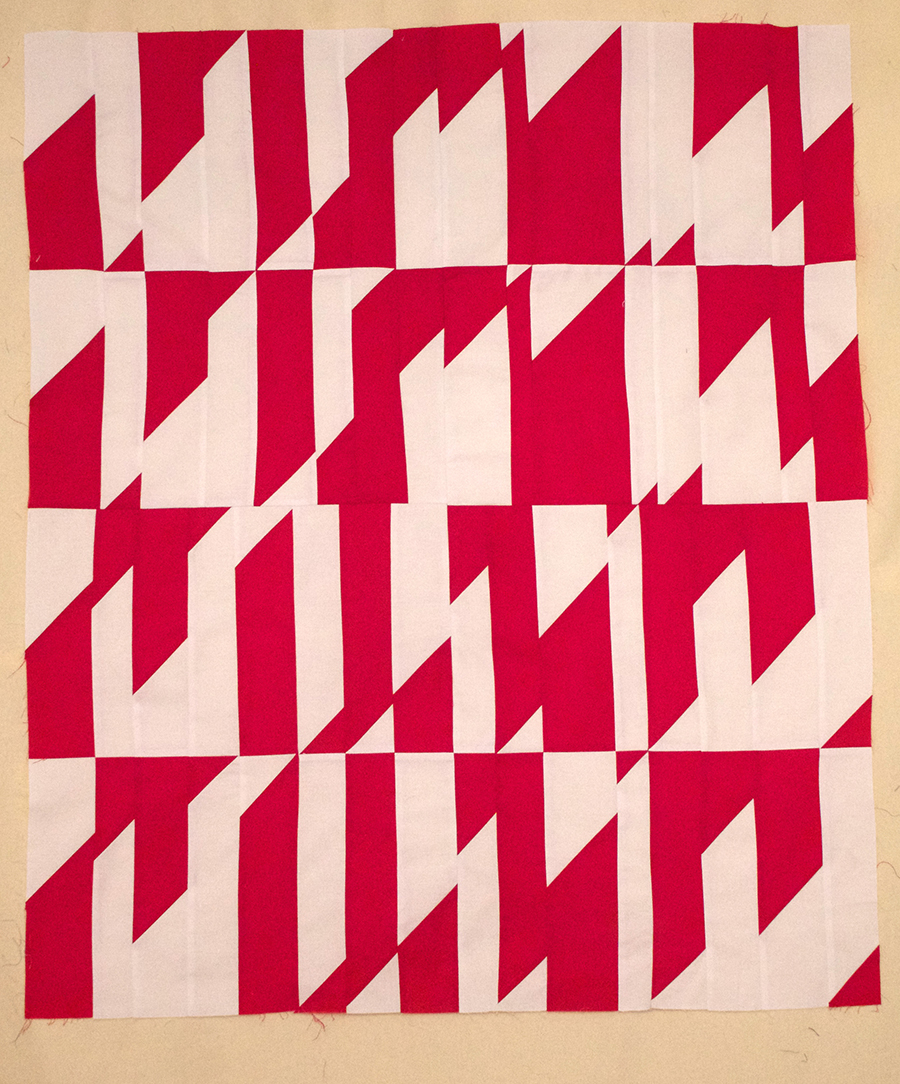
You will have 4 different large blocks. Sew each of the blocks together to make you’re finished quilt.
 Step 12:
All done!

Love this! You’ve inspired me!
LikeLike